> ## Documentation Index
> Fetch the complete documentation index at: https://docs.get-clara.tech/llms.txt
> Use this file to discover all available pages before exploring further.
# 入站邮件自动回复
> 构建一个使用 AI 对入站邮件进行分拣,并自动以线程形式发送回复的工作流。
在数秒内回复入站邮件—而不是数小时。 此工作流使用 AI 智能体筛除噪音(新闻通讯、垃圾邮件、自动回复),为真实邮件起草个性化回复,并在原始会话中以线程形式发送该回复。
## 电子邮件线程如何运作
每封电子邮件都包含一个隐藏的 `Message-ID` 头部—由发件人的邮件服务器分配的唯一指纹。 当您回复一封电子邮件时,您的邮件客户端会设置一个 `In-Reply-To` 标头以引用该指纹。 这就是 Gmail、Outlook 以及其他所有客户端将邮件分组为会话的方式。
在 Twenty 中,该指纹作为 `headerMessageId` 存储在 Message 对象中。 您的工作流会获取它,并将其传递到 Send Email 操作的 In-Reply-To 字段。
## 构建工作流
### 步骤 1:创建新工作流
前往 **Settings -> Workflows** 并单击 **+ New Workflow**。
### 步骤 2:在收到邮件时触发
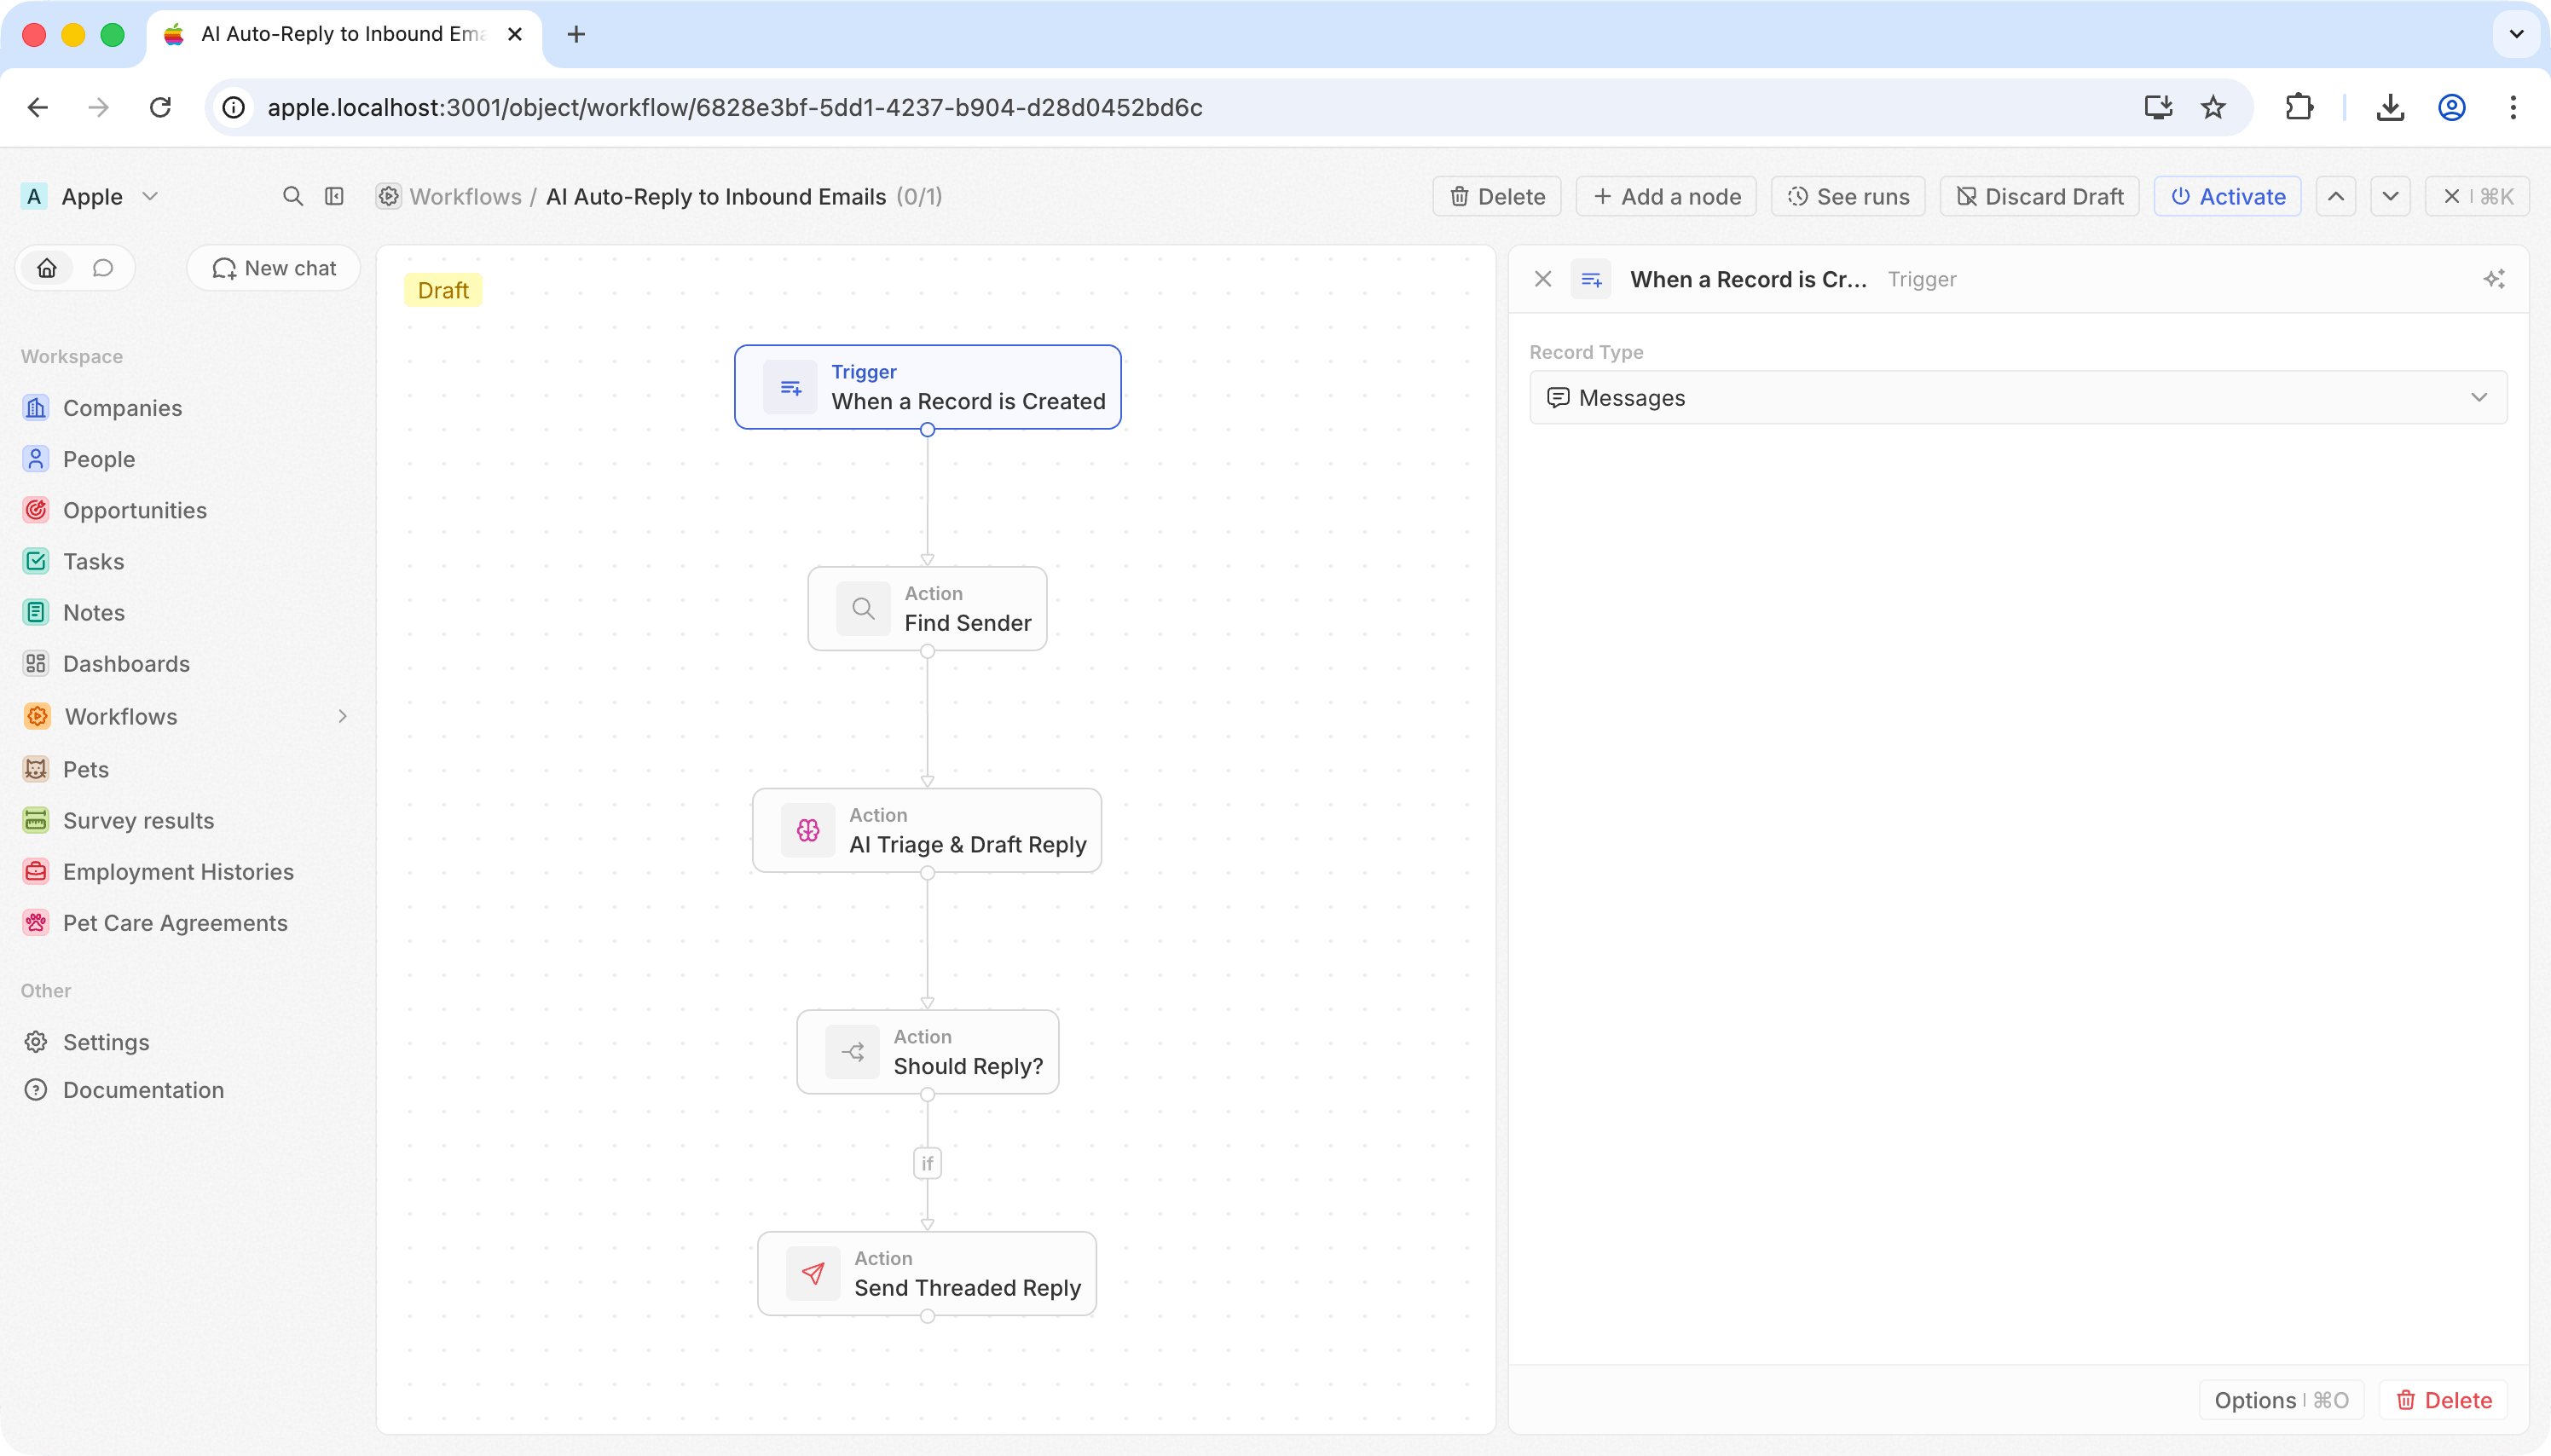
选择 **When a Record is Created**,然后选择 **Messages**。
每当有邮件进入 Twenty 时,这一步就会触发。
 ### 步骤 3:查找发件人
添加 **搜索记录** 操作.
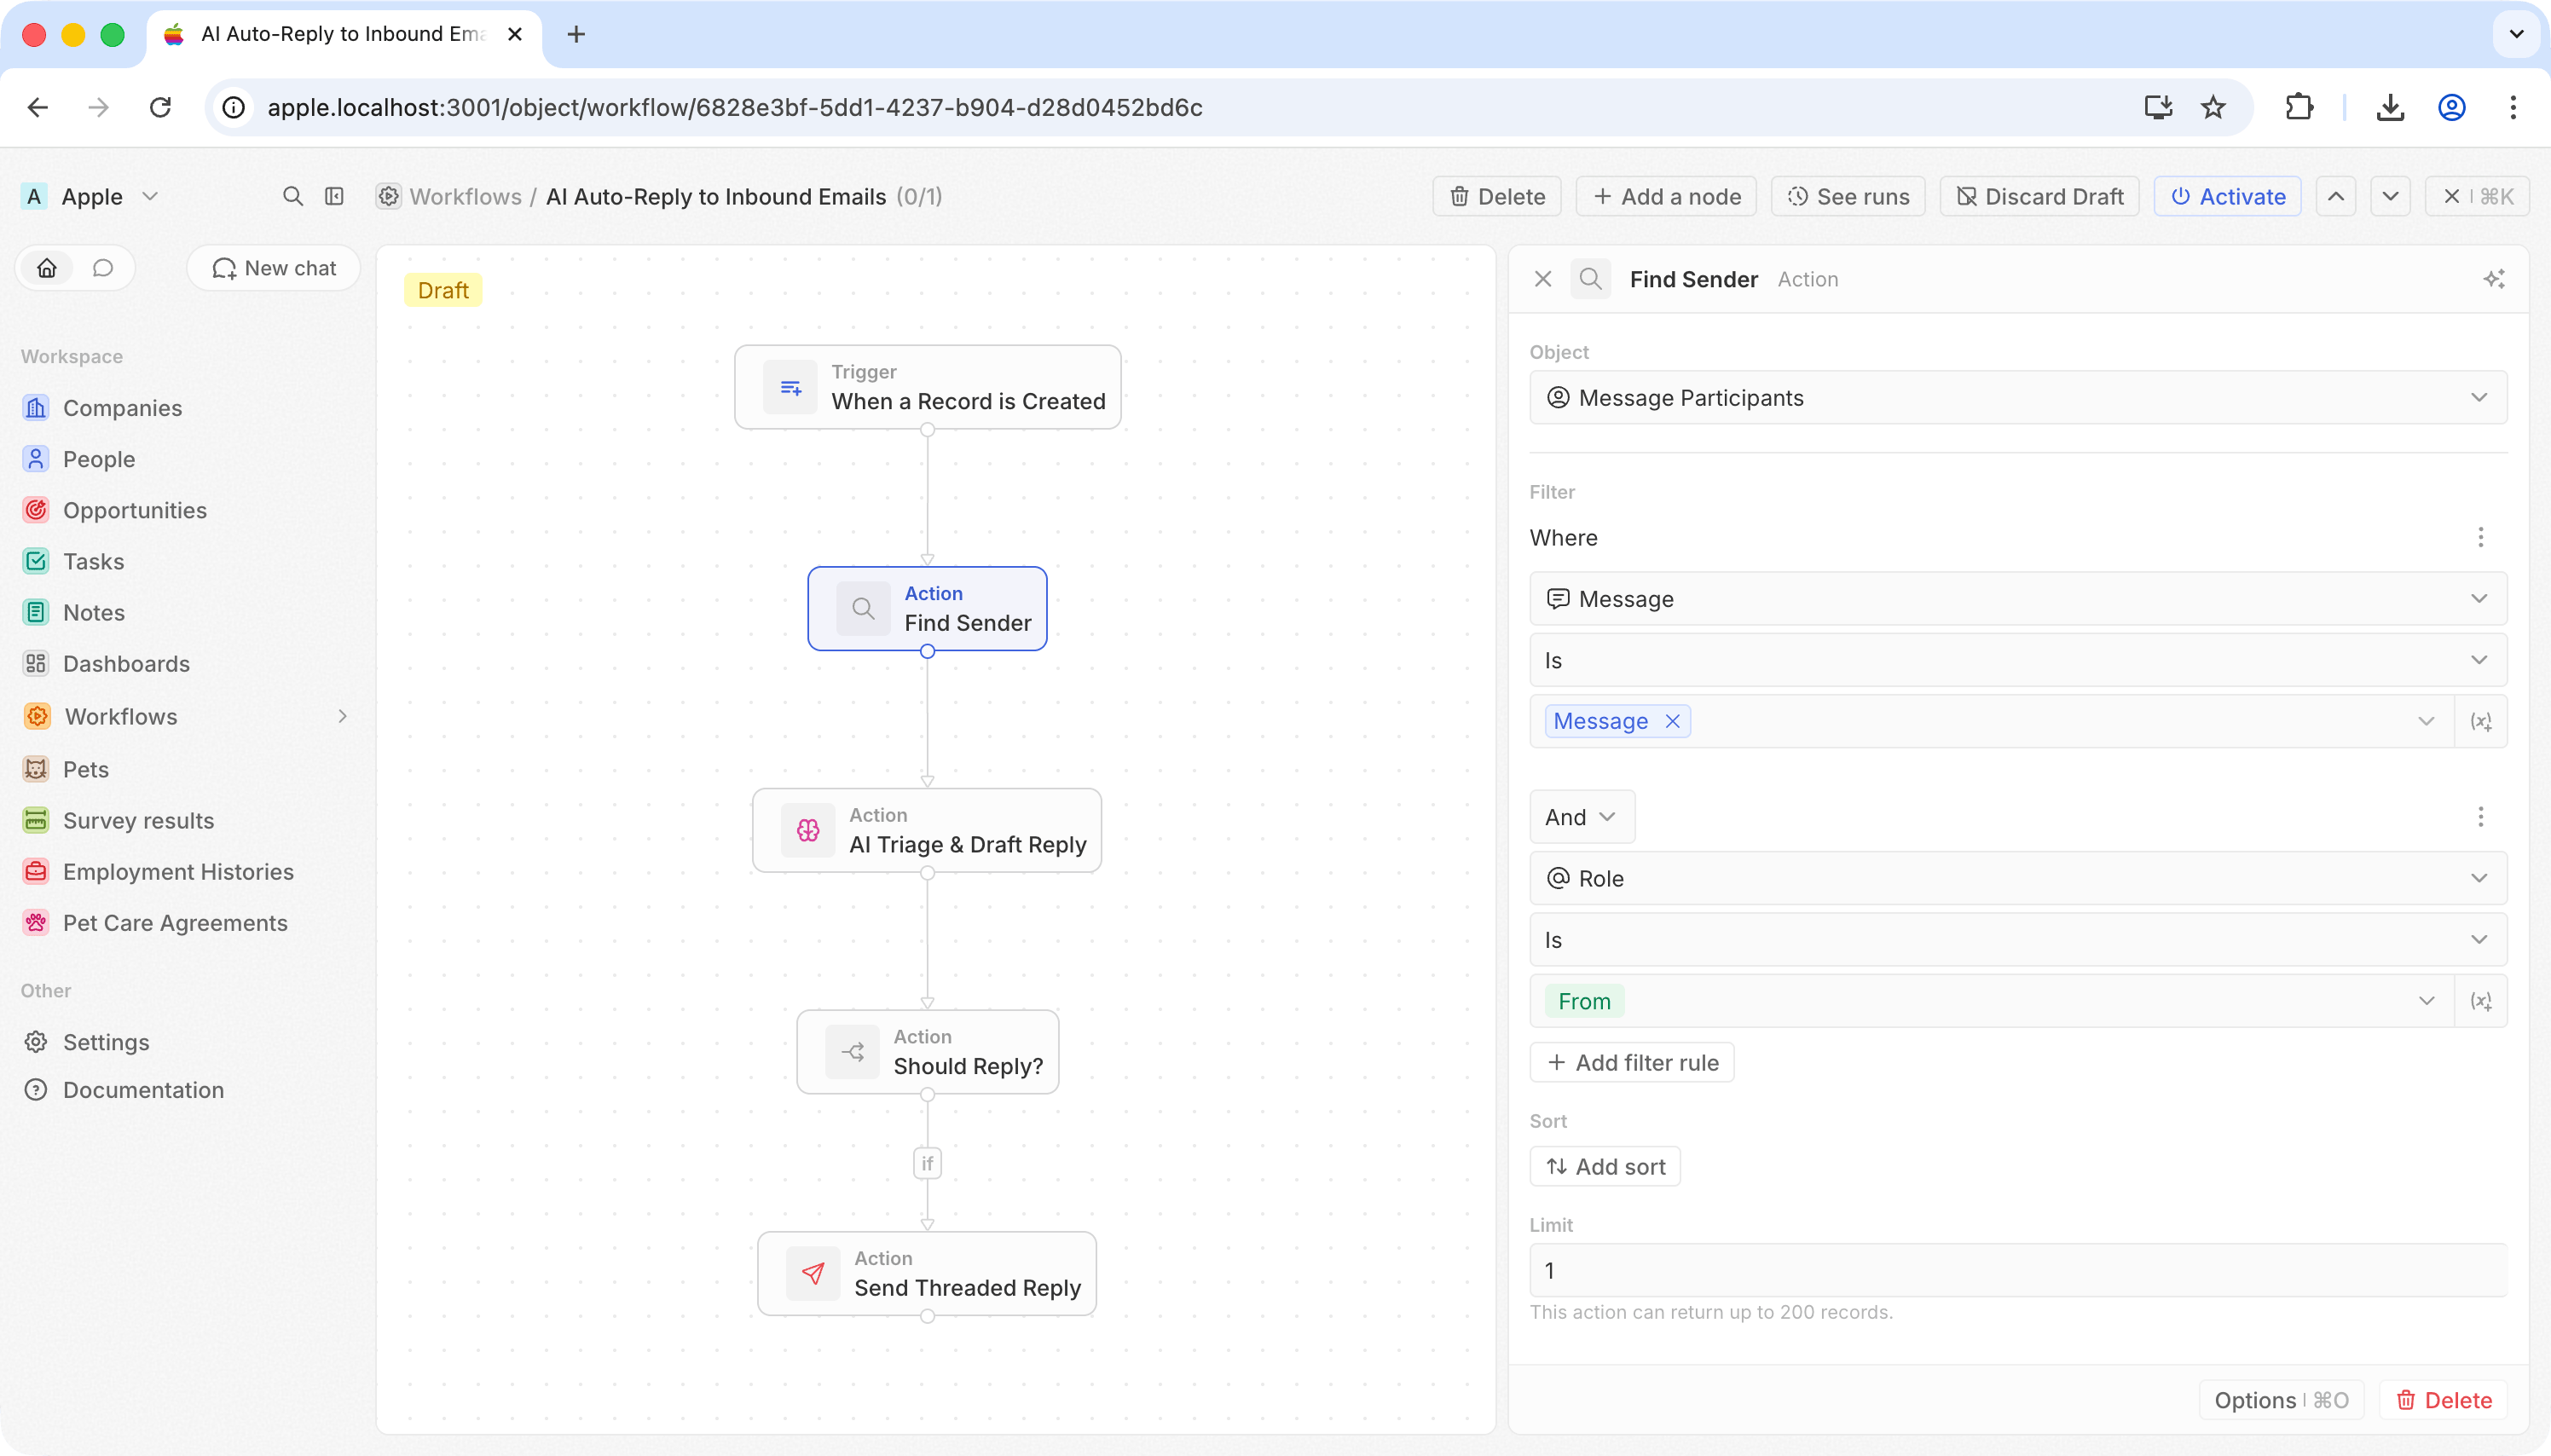
发件人的地址不在消息本身上——而是在关联的 Message Participant 记录中。
| 字段 | 值 |
| ------- | ------------------------------ |
| **对象** | 消息参与者 |
| **筛选器** | Message **为** `{{trigger.id}}` |
| **筛选器** | Role **为** From |
| **限制** | 1 |
这会在 `handle` 中提供发件人的邮箱地址,在 `displayName` 中提供其姓名。
### 步骤 3:查找发件人
添加 **搜索记录** 操作.
发件人的地址不在消息本身上——而是在关联的 Message Participant 记录中。
| 字段 | 值 |
| ------- | ------------------------------ |
| **对象** | 消息参与者 |
| **筛选器** | Message **为** `{{trigger.id}}` |
| **筛选器** | Role **为** From |
| **限制** | 1 |
这会在 `handle` 中提供发件人的邮箱地址,在 `displayName` 中提供其姓名。
 ### 步骤 4:AI 分流并起草回复
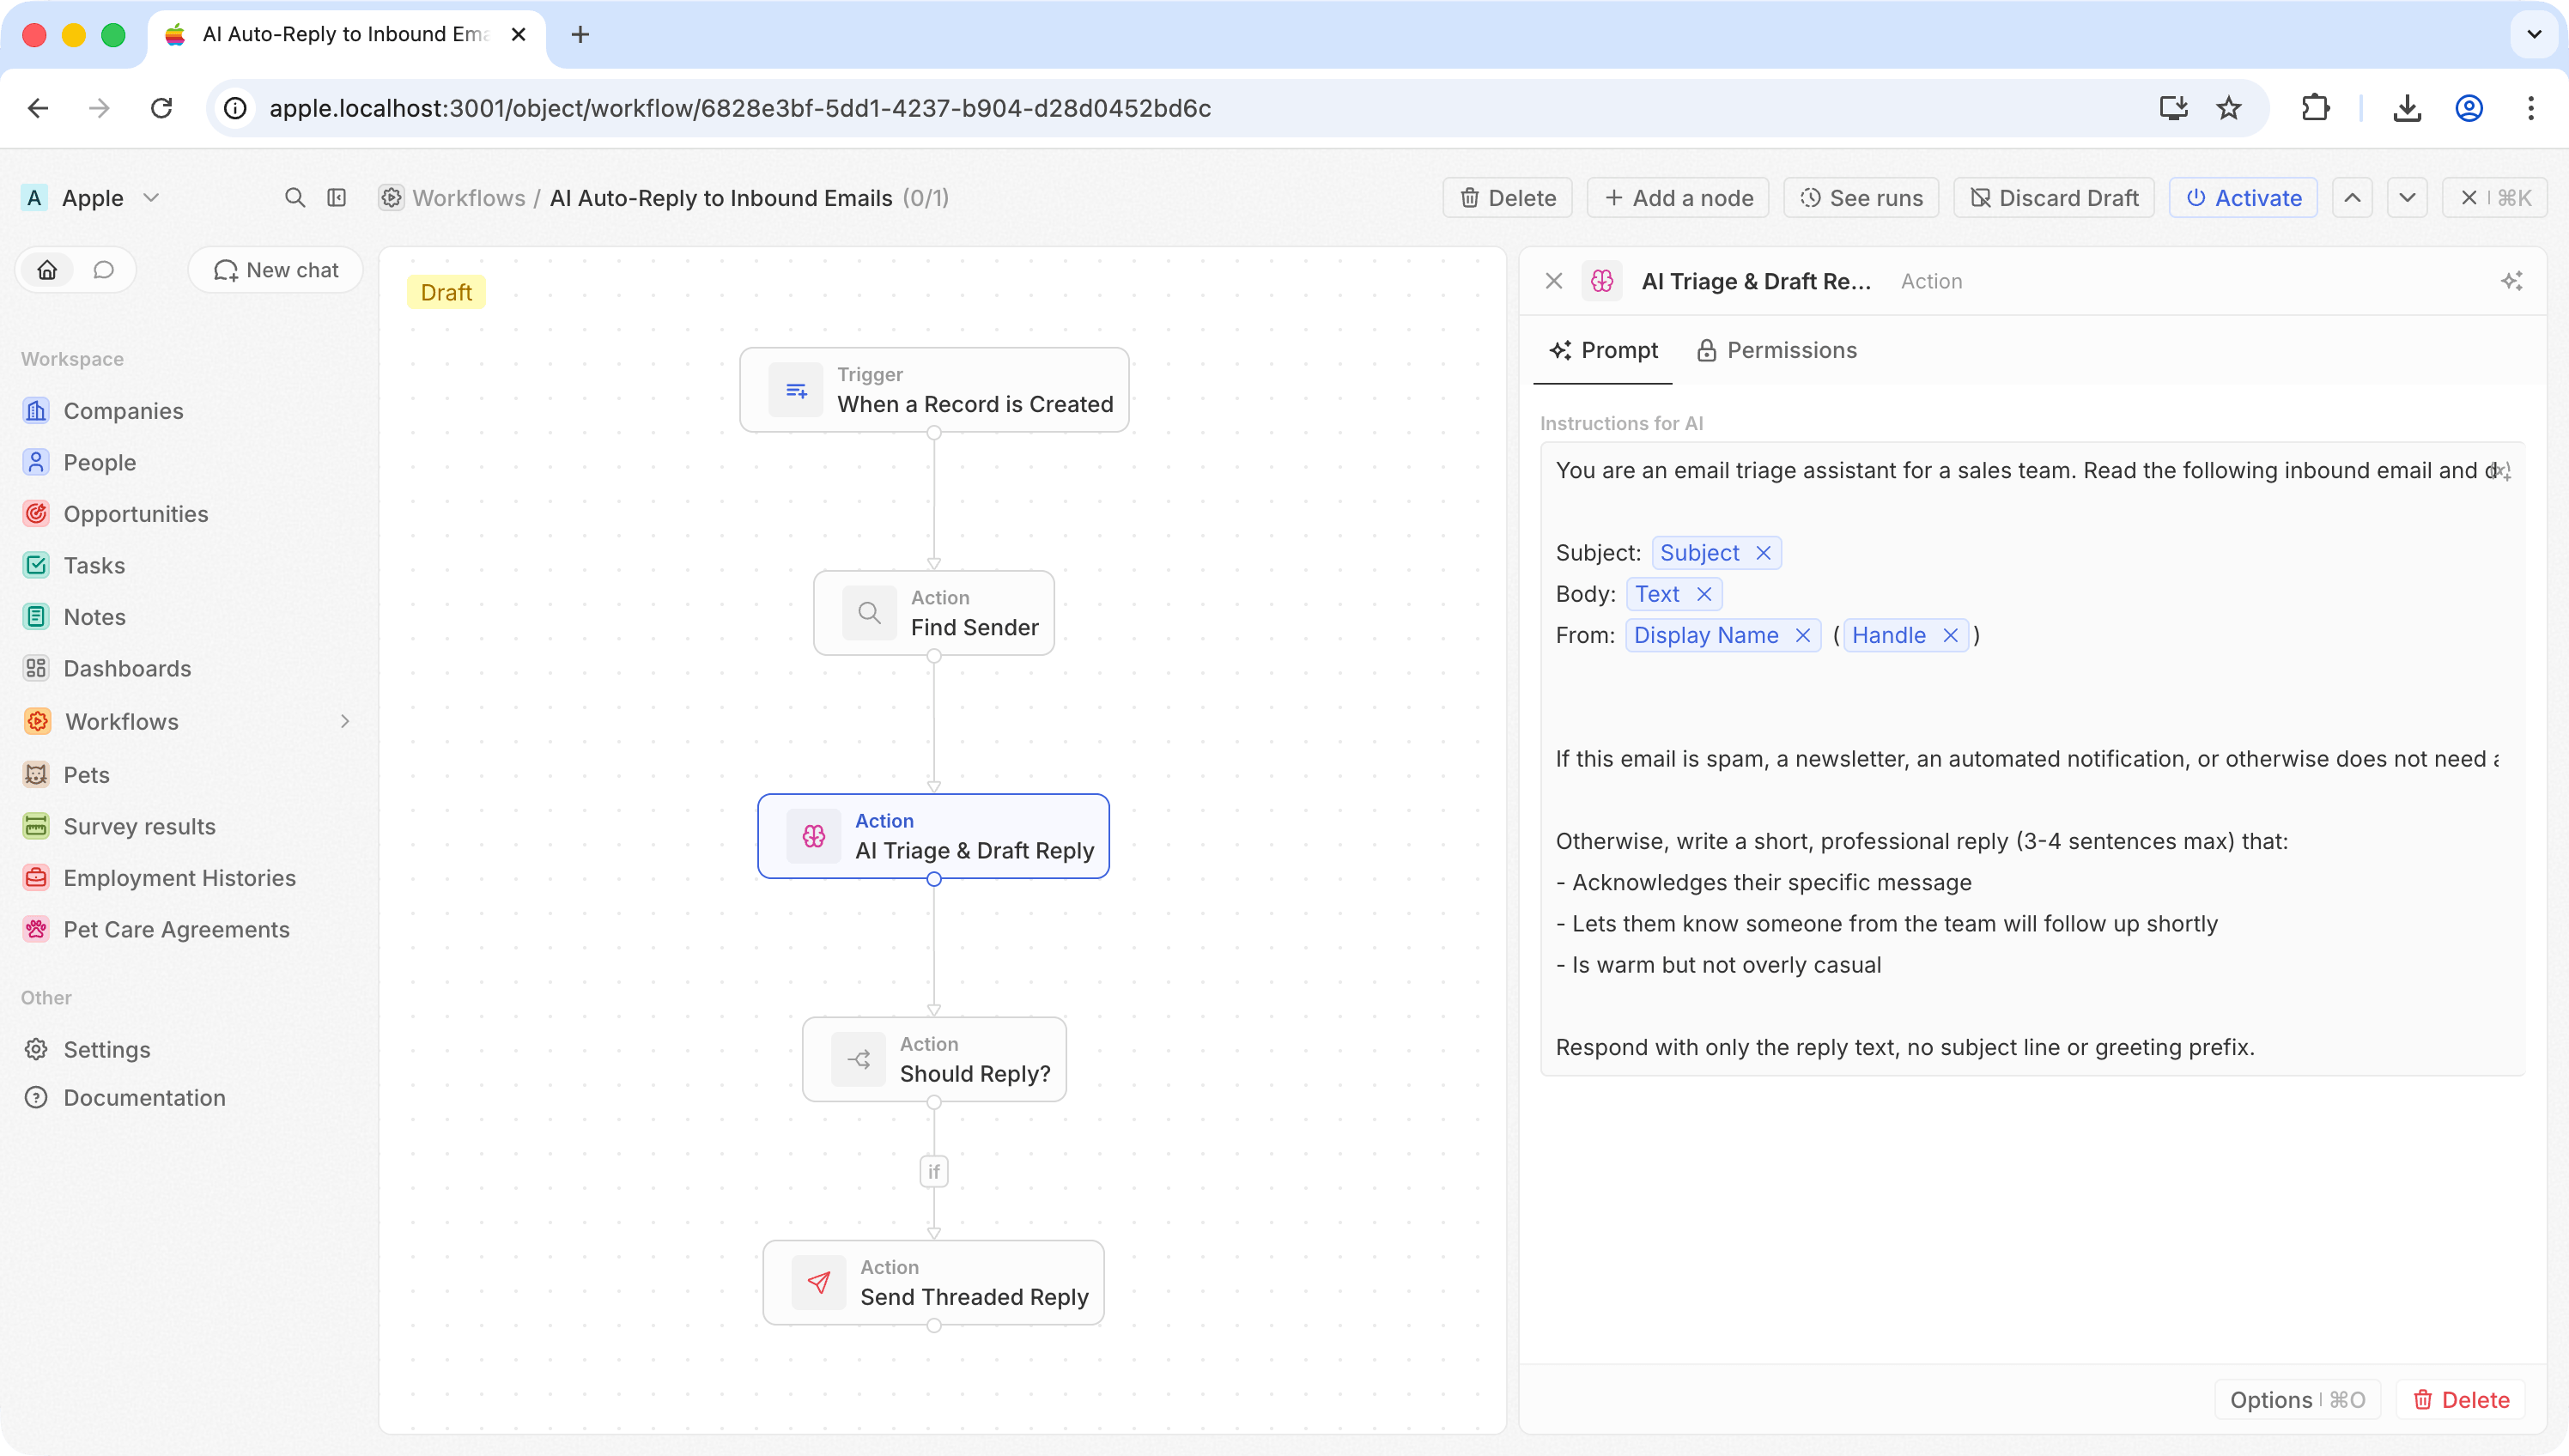
添加一个 **AI Agent** 操作。 此单一步骤完成两件事:决定该邮件是否需要回复;如果需要,则撰写一封回复。
使用类似如下的提示词:
```
You are an email triage assistant for a sales team. Read the following
inbound email and decide if it deserves a reply.
Subject: {{trigger.subject}}
Body: {{trigger.text}}
From: {{Find Sender.first.displayName}} ({{Find Sender.first.handle}})
If this email is spam, a newsletter, an automated notification, or
otherwise does not need a human reply, respond with exactly: SKIP
Otherwise, write a short, professional reply (3-4 sentences max) that:
- Acknowledges their specific message
- Lets them know someone from the team will follow up shortly
- Is warm but not overly casual
Respond with only the reply text, no subject line or greeting prefix.
```
AI Agent 会将其响应输出到 `response` 字段,后续步骤可以引用该字段。
### 步骤 4:AI 分流并起草回复
添加一个 **AI Agent** 操作。 此单一步骤完成两件事:决定该邮件是否需要回复;如果需要,则撰写一封回复。
使用类似如下的提示词:
```
You are an email triage assistant for a sales team. Read the following
inbound email and decide if it deserves a reply.
Subject: {{trigger.subject}}
Body: {{trigger.text}}
From: {{Find Sender.first.displayName}} ({{Find Sender.first.handle}})
If this email is spam, a newsletter, an automated notification, or
otherwise does not need a human reply, respond with exactly: SKIP
Otherwise, write a short, professional reply (3-4 sentences max) that:
- Acknowledges their specific message
- Lets them know someone from the team will follow up shortly
- Is warm but not overly casual
Respond with only the reply text, no subject line or greeting prefix.
```
AI Agent 会将其响应输出到 `response` 字段,后续步骤可以引用该字段。
 ### 步骤 5:根据 AI 的决策进行分支
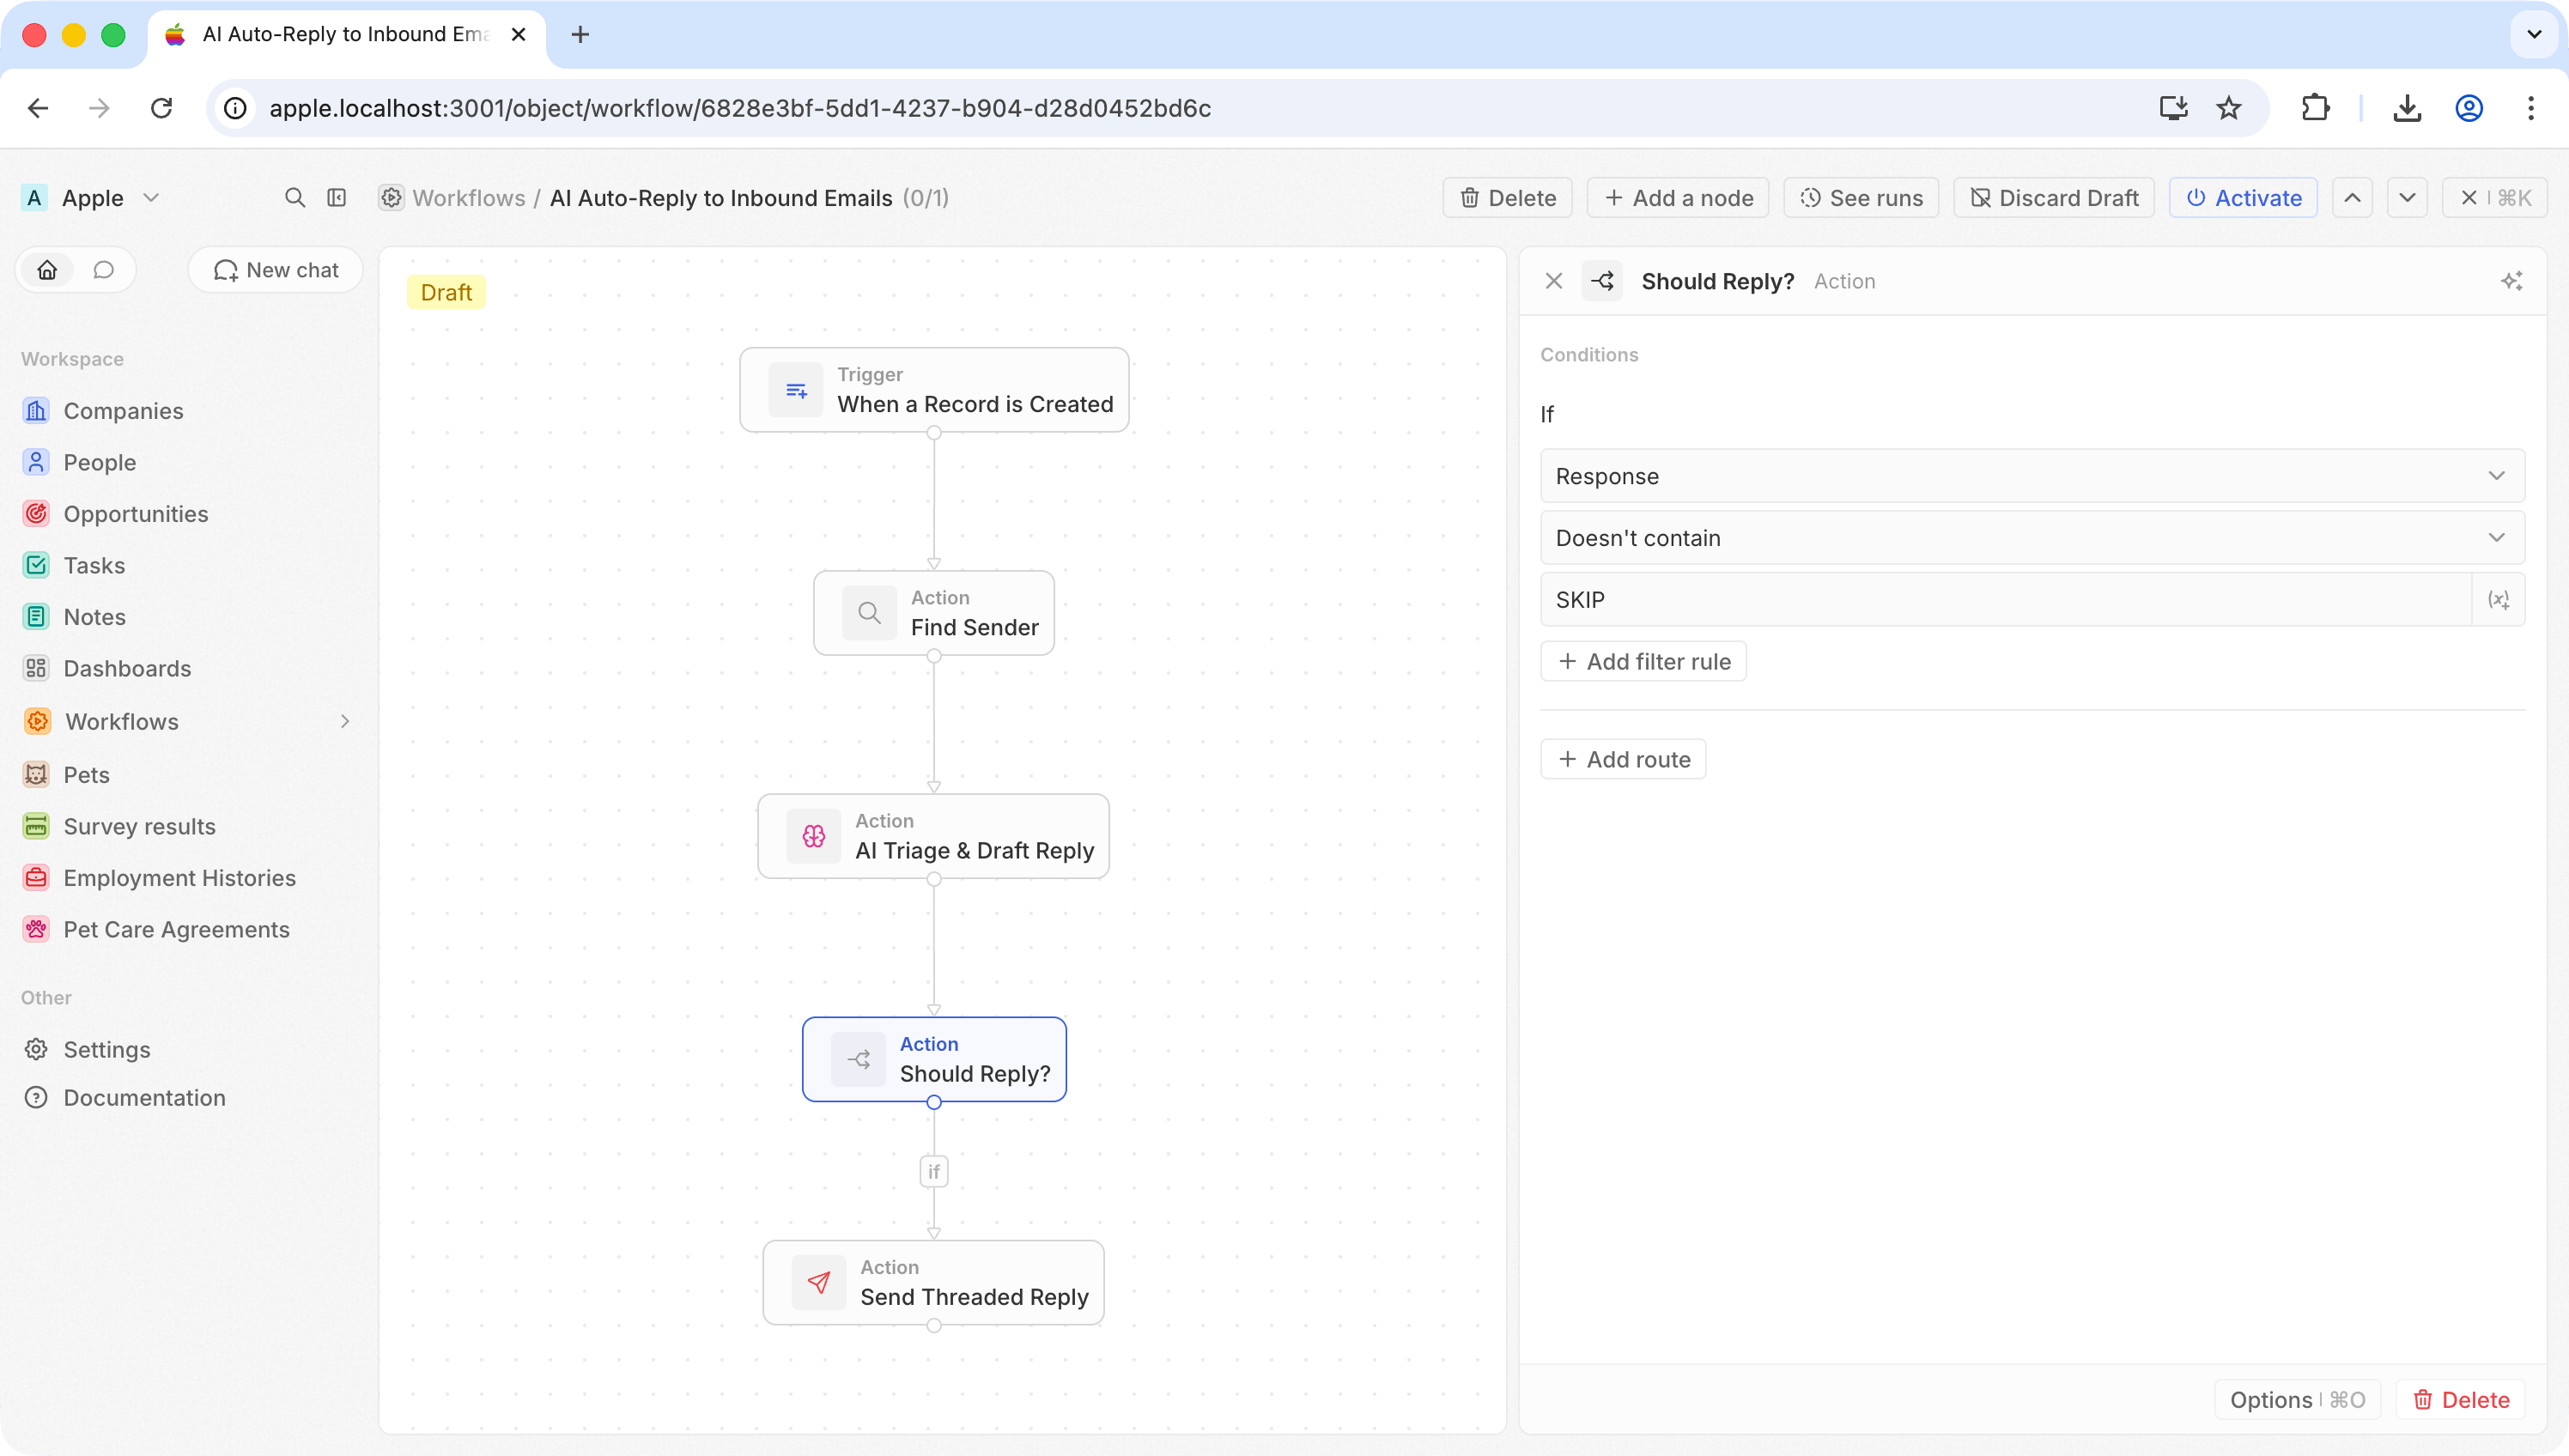
添加一个 **If/Else** 操作,用于检查 AI 决定是回复还是跳过。
| 字段 | 值 |
| ------- | ---------------------------------- |
| **条件** | AI Agent `response` **不包含** `SKIP` |
| **若为真** | 继续执行 Send Email |
| **否则** | 不执行任何操作(工作流结束) |
垃圾邮件、新闻简报以及自动生成的邮件会被丢弃。 其余内容将进入下一步。
### 步骤 5:根据 AI 的决策进行分支
添加一个 **If/Else** 操作,用于检查 AI 决定是回复还是跳过。
| 字段 | 值 |
| ------- | ---------------------------------- |
| **条件** | AI Agent `response` **不包含** `SKIP` |
| **若为真** | 继续执行 Send Email |
| **否则** | 不执行任何操作(工作流结束) |
垃圾邮件、新闻简报以及自动生成的邮件会被丢弃。 其余内容将进入下一步。
 ### 步骤 6:发送会话内回复
在 "若为真" 分支上添加一个 **Send Email** 操作。 单击 **Advanced options**,然后选择 **Add In-Reply-To**。
| 字段 | 值 |
| --------------- | -------------------------------------- |
| **收件人** | `{{Find Sender.first.handle}}` |
| **主题** | `Re: {{trigger.subject}}` |
| **正文** | `{{AI Triage & Draft Reply.response}}` |
| **In-Reply-To** | `{{trigger.headerMessageId}}` |
正是 In-Reply-To 字段使其成为一次回复,而不是一段新的会话。 收件人在 Gmail、Outlook 或任何其他客户端中,会看到它被归入原始邮件下的同一会话。
### 步骤 6:发送会话内回复
在 "若为真" 分支上添加一个 **Send Email** 操作。 单击 **Advanced options**,然后选择 **Add In-Reply-To**。
| 字段 | 值 |
| --------------- | -------------------------------------- |
| **收件人** | `{{Find Sender.first.handle}}` |
| **主题** | `Re: {{trigger.subject}}` |
| **正文** | `{{AI Triage & Draft Reply.response}}` |
| **In-Reply-To** | `{{trigger.headerMessageId}}` |
正是 In-Reply-To 字段使其成为一次回复,而不是一段新的会话。 收件人在 Gmail、Outlook 或任何其他客户端中,会看到它被归入原始邮件下的同一会话。
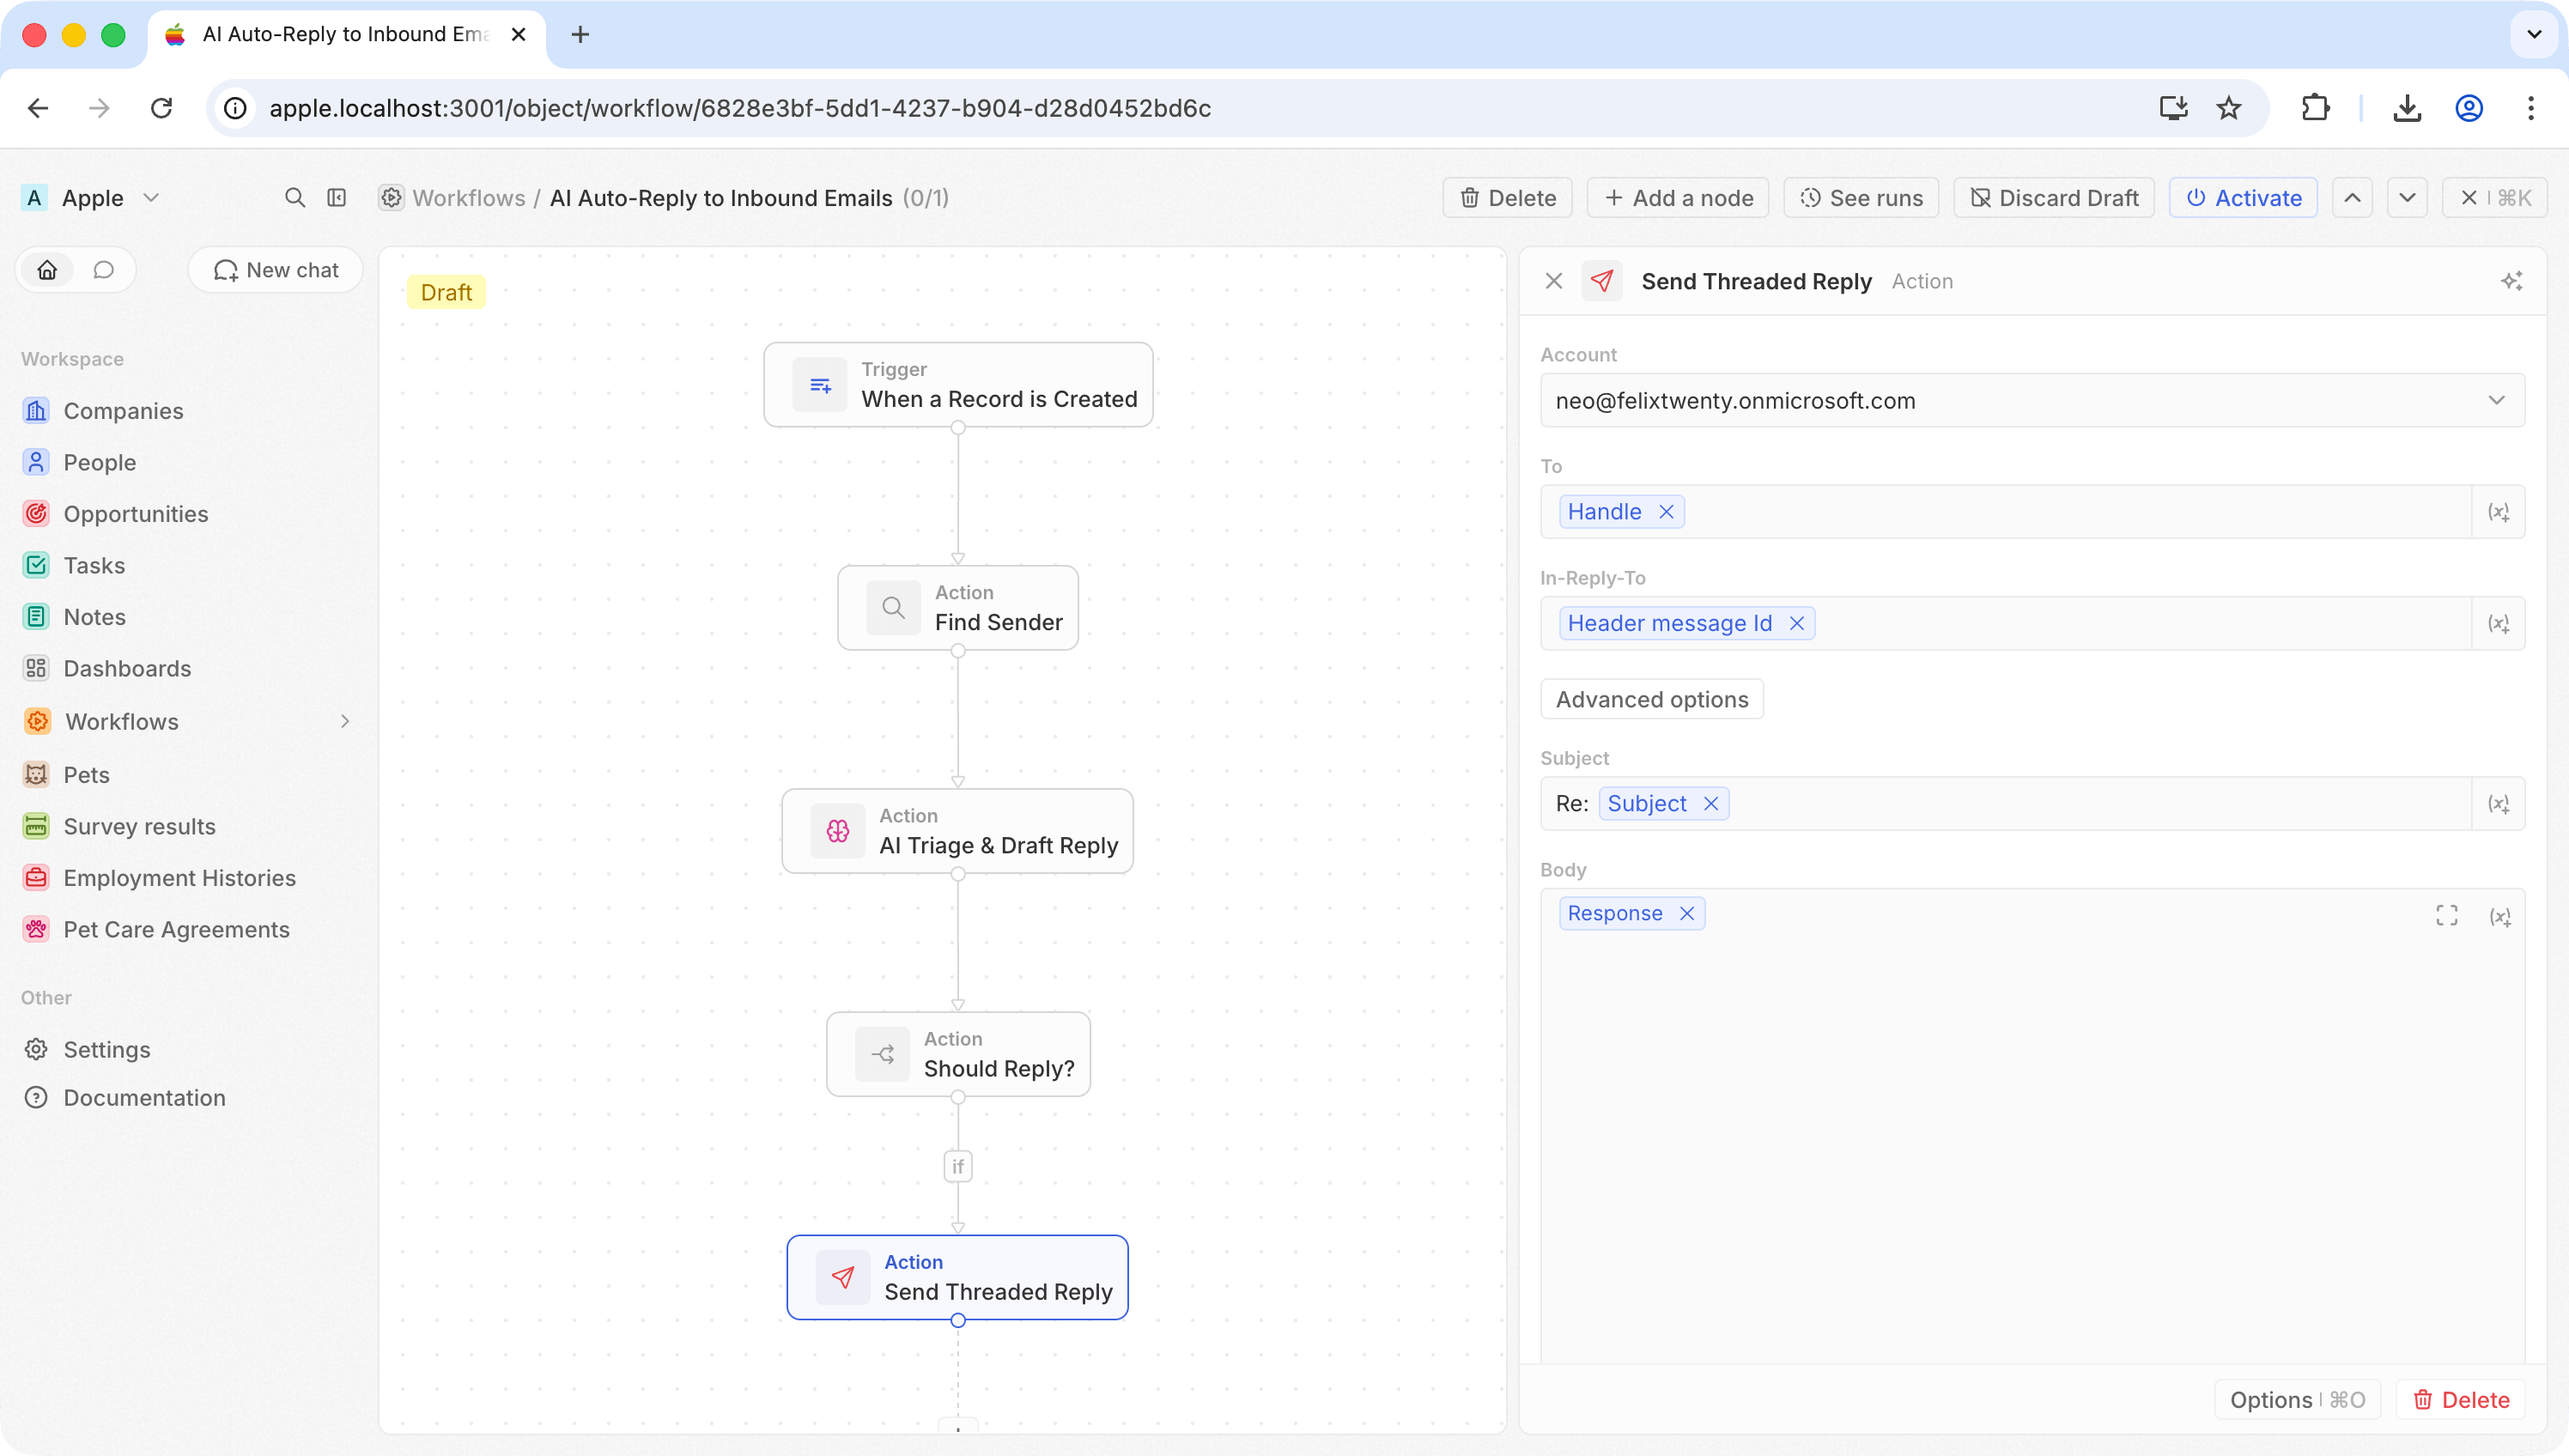 **In-Reply-To** 需要来自触发器的 `message.headerMessageId`——它是该邮件的唯一指纹,而不是收件人地址。 如果将其留空,邮件仍会发送,只是作为一封独立的消息。
Gmail 使用主题行将邮件归入同一会话。 要让 Gmail 在原始会话中显示回复,主题行**必须**以 `Re:` 开头(包括冒号和空格)。 否则,即使正确设置了 In-Reply-To 标头,回复也会显示为一个单独的会话。
### 步骤 7:测试并启用
点击 **Test**,然后检查您的邮件客户端。 回复应当嵌套显示在原始邮件下方。
确认无误后启用。
## 进阶构建思路
* **仅回复 VIP** — 添加一个分支,用于检查发件人的域名,或他们是否在 Twenty 中作为联系人存在
* **按意图路由** — 使用不同的 AI Agent 提示词,将销售咨询与支持请求区分处理
* **回复前先丰富信息** — 添加一个 Search Records 步骤,将发件人的公司或交易历史拉入 AI 提示词中,以获得更个性化的回复
**In-Reply-To** 需要来自触发器的 `message.headerMessageId`——它是该邮件的唯一指纹,而不是收件人地址。 如果将其留空,邮件仍会发送,只是作为一封独立的消息。
Gmail 使用主题行将邮件归入同一会话。 要让 Gmail 在原始会话中显示回复,主题行**必须**以 `Re:` 开头(包括冒号和空格)。 否则,即使正确设置了 In-Reply-To 标头,回复也会显示为一个单独的会话。
### 步骤 7:测试并启用
点击 **Test**,然后检查您的邮件客户端。 回复应当嵌套显示在原始邮件下方。
确认无误后启用。
## 进阶构建思路
* **仅回复 VIP** — 添加一个分支,用于检查发件人的域名,或他们是否在 Twenty 中作为联系人存在
* **按意图路由** — 使用不同的 AI Agent 提示词,将销售咨询与支持请求区分处理
* **回复前先丰富信息** — 添加一个 Search Records 步骤,将发件人的公司或交易历史拉入 AI 提示词中,以获得更个性化的回复